Table of Content
In an effort to create a completely one-of-a-kind necklace, I created this wire-name necklace. I love how mine turned out and wanted to show you guys how it’s done. Remember that when it comes to shaping the words, the best course of action is to just practice. After you have finished attaching 1 side of the clasp, repeat the same process for the other end of the necklace base. Grasp 1 of the jump rings near the opening with 1 pair of pliers. Then, use the other pair of pliers to grasp the other side of the jump ring next to the opening.
Insert the end of the wire or thread through the end of the clasp and tie it in a knot. This will prevent the beads from slipping off as you string them and then you will also have the first half of the clasp in place. Its recommend cutting thickness is within 1.2mm. These earrings are fairly simple to make, and only require two crystals for your charms, two jump rings, and two earring findings. You will also need a set of pliers to help open and close the jewelry pieces. Choose a chain or cord material as the base for a pendant necklace.
how to make name necklace with our fiber laser engraving machine 50 watts
Use the pliers to open the ring 0.25 in (0.64 cm). Choose chunky beads for a statement necklace. Chunky beads work well as a complement to smaller beads, or as the main element in a chunky statement necklace. Wire or fishing line works best as a base for chunky beads since they are heavier than normal beads.
Thin, copper wire is always a good choice for practice wire. To learn these different techniques you can read jewelry making books, search for tutorials, and take jewelry making workshops. You need to make a brass prototype to make sure you got all the curves and connections. This is the stage that needs to rework to look if it is close to the drawing design.
How to Make a Necklace
You can even bread the strands before you secure them into a loop if you like. Select a pendant as a focal point for the necklace. Pendants are the easiest type of necklace to make.

Once you create this path, break it apart from your main text and set aside. Now is the time when you must decide on your final size. I'm going with 2.5" because that's pretty big and showy but not ridiculous. If you put the holes before you resize, your jumprings might not fit in the holes. Add a jump ring to an end of your bracelet. Add on a crimp bead and a jump ring to the end of your bracelet.
Want to change the shipping address or upgrade the shipping method?
Tie the end of your necklace base around 1 end of a clasp, if desired. If the necklace is large enough, then you can simply tie the ends together when you are finished. Or, use a lobster clasp in the color and size of your choice.
If not, you can always reopen the jump ring and turn the crystal around on the ring. Once you have a chosen jewelry project that you want to make, gather and assemble all of the needed materials. Ever wondered how to make those cool laser cut name plate necklaces everyone seems to be wearing?
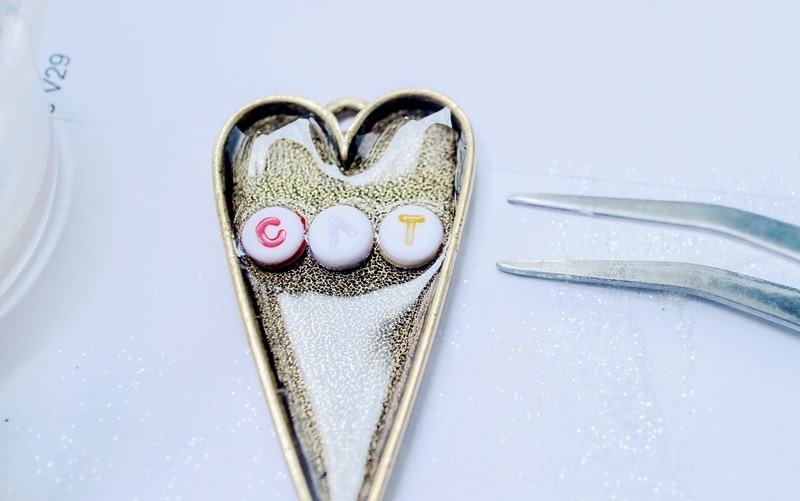
Purchase beads in the jewelry supply section of a craft supply store or online. Make sure that you can fit the necklace base material through the openings on your beads.Use seed beads as filler or for a delicate beaded necklace. Seed beads are small beads that will fill out the wire or thread. These are great for creating a delicate necklace or for filling the spaces in between your larger beads.
Preheat the oven according to the shrink plastic instructions. 3.if above finished, then just click Marking, the laser machine will go to cut automatically. Just starting on trying to make jewelry, as it will help so much.
Use your crimping pliers to clamp down on the crimp bead and secure the crimp bead.You can also trim away the excess wire near the crimp bead so you don’t get poked. Repeat this process with the other side of bracelet. Once the crystals are on the jump rings, slide the earring findings onto the jump rings. You should be able to hold a jump ring and have both the crystal and earring finding hanging off. Use your pliers to close and secure the jump rings.This earring project can take less than five minutes, and at the end, you have a unique pair of beautiful earrings. Use your pliers to twist and open up the two jump rings.

Then add a third bead to act as the connecting, bridge bead. Figure out how much length the clasp and jump ring are going to add to your final product bracelet, take that into consideration, and remove some beads equivalent to that length. Begin by stringing your beads onto the wire still attached to the spool.
For example, there are beading jewelry kits, stringing jewelry kits, and wire jewelry kits, just to name a few. Determine an element as the main melody of the whole necklace, adjust the size and details of each part to form a complete work in a proper way. It is such a way of production that determines the degree of simplicity of the finished products varies from day to day. Those with green hands can also produce their own works, and those with strong abilities can give unlimited play to their fantastic ideas. I love that they can be customized so many ways. I may order more with different words & different lengths.

Silver/Gold wire and chains - You don’t necessarily need to decide what type of chain you will be using, you can select a variety to give you options. Pencil, ruler, paper - to help you with measurements and designs.
Wrap them up nice and they'll make the perfect Mother's Day, graduation, or just-because gift. 1.Import your nameplate design in dxf, ai,plt or other vector file into our laser software Ezcad. This fourth bead will act as a bridge between the other beads.


No comments:
Post a Comment